
Scroll down to see the video, Like & Follow!
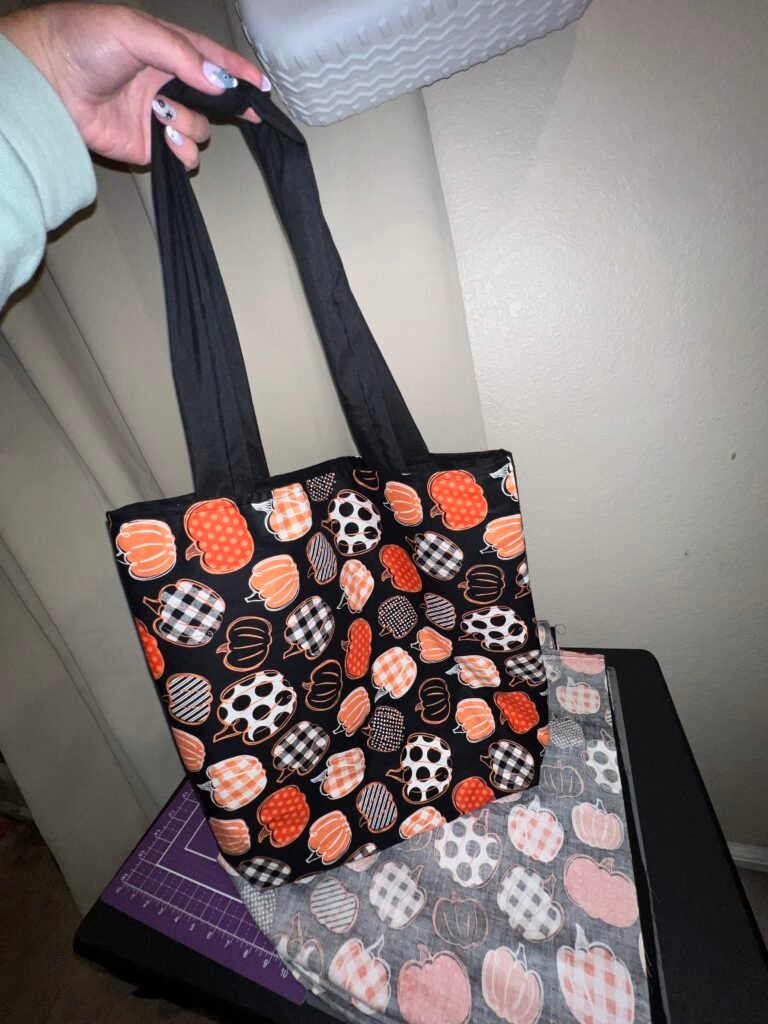
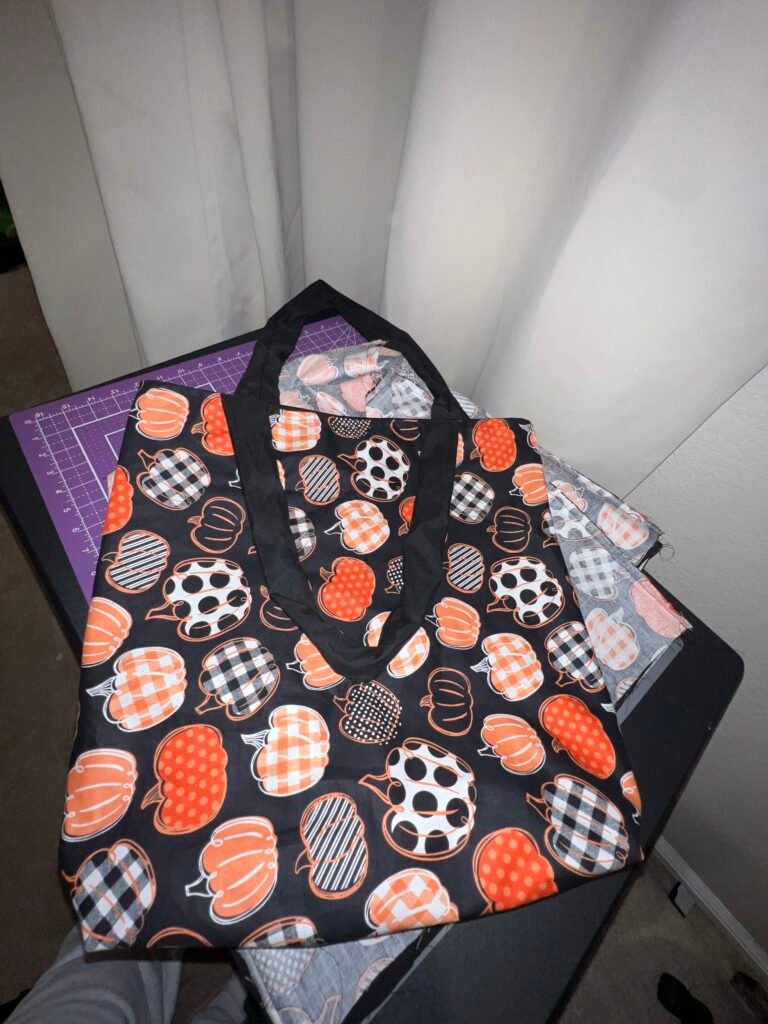
A simple tote bag is one of the best beginner sewing projects. It’s practical, reusable, and easy to customize with different fabrics. This tutorial walks you through every step, from cutting fabric to finishing the bag.
Finished Size (Approximate)
- 14 in wide x 15 in tall
- Handle drop: 10 in
You can easily adjust the size by changing the fabric measurements.
Materials & Supplies Needed
As an Amazon Associate I earn from qualifying purchases.
Fabric
- Exterior fabric: 1 piece, 16 in x 34 in (I cannot seem to find the exact fabric, but here are some similar designs – Pumpkin Cartoon Fabric, Autumn Pumpkin Fabric)
(Cotton, canvas, denim, or linen work well)
This single piece will be folded to create the front and back of the bag.
Optional Interfacing (For Structure)
- Fusible interfacing: 1 piece, 16 in x 34 in
(Medium‑weight for canvas, lightweight for quilting cotton)
Handles
Choose one option:
- Fabric handles: 2 strips, 4 in x 22 in
- OR cotton webbing: 2 pieces, 22 in long
Thread & Notions
- All‑purpose sewing thread
- Fabric scissors or rotary cutter
- Pins or sewing clips
- Measuring tape or ruler
- Fabric marking pen or chalk
- Iron and ironing board
- Seam ripper (optional)
Sewing Machine Supplies
- Sewing machine
- Universal needle (size 80/12 recommended)
Step‑by‑Step Instructions
Step 1: Cut & Prepare Fabric
- Cut all fabric pieces according to the measurements above.
- If using interfacing, fuse it to the wrong side of the main fabric following the manufacturer’s instructions.
- Press fabric flat.
Step 2: Make the Handles (If Using Fabric)
- Fold each handle strip lengthwise in half, right sides together.
- Sew along the long edge using a ¼ in seam allowance.
- Turn the handle right side out.
- Press flat with the seam centered on the back.
- Topstitch along both long edges for strength.
Skip this step if using pre‑made webbing.
Step 3: Prepare the Bag Body
- Fold the main fabric right sides together, matching the short edges.
- Sew both side seams using a ½ in seam allowance.
- Finish raw edges with a zigzag stitch or serger if desired.
Step 4: Create Boxed Corners (Optional Flat Bottom)
- With the bag inside out, pinch one bottom corner so the side seam aligns with the bottom fold.
- Measure 2 in from the point and draw a straight line.
- Sew across the line.
- Trim excess fabric, leaving a ¼ in seam allowance.
- Repeat for the other corner.
Step 5: Hem the Top Edge
- Turn the top edge down ½ in and press.
- Turn down another 1 in and press again to encase the raw edge.
- Pin or clip in place.
Step 6: Attach the Handles
- Turn the bag right side out.
- Measure 3½ in from each side seam and mark handle placement.
- Insert handle ends under the folded hem, making sure handles are not twisted.
- Pin securely.
Step 7: Stitch the Top & Secure Handles
- Sew around the top edge close to the inner folded edge.
- Sew a second row of stitching ¼ in above the first for durability.
- Backstitch several times over each handle end for extra strength.
Optional Customizations
- Add an inside pocket
- Use contrast stitching
- Make longer handles for a shoulder tote
- Add interfacing only to the bottom half for lighter weight
Time & Skill Level
- Time: 30–45 minutes
- Skill level: Beginner
Final Thoughts
This simple tote bag is perfect for groceries, books, or everyday use—and it’s a great project for learning straight seams and basic construction. Once you make one, you’ll want to make more in different fabrics.
Happy sewing!
Like & Follow for more content!
@bstitched Sew a fall tote bag with me! #sewing #fyp #sewingideas #sewingtutorial #totebag ♬ som original – douglasroberto169