
Scroll down to see the video, Like & Follow!
A zipper pouch is a classic sewing project that’s perfect for beginners and endlessly useful. You can use it to store makeup, pens, sewing tools, or small items—and it makes a great handmade gift. This tutorial shows you how to sew a fully lined zipper pouch with clean finishes.
Finished Size (Approximate)
- 8 in wide x 5 in tall
You can easily change the size by adjusting the fabric measurements.
Materials & Supplies Needed
As an Amazon Associate I earn from qualifying purchases.
Fabric
- Exterior fabric: 2 pieces, 9 in x 6 in
- Lining fabric: 2 pieces, 9 in x 6 in
(Cotton quilting fabric is ideal for beginners.)
Optional Interfacing (Recommended)
- Fusible interfacing: 2 pieces, 9 in x 6 in
(Adds structure and durability)
Zipper
- 1 zipper, 9 in long
(Nylon coil zippers are easiest to sew)
Thread & Notions
- All‑purpose sewing thread
- Fabric scissors or rotary cutter
- Pins or sewing clips
- Measuring tape or ruler
- Fabric marking pen or chalk
- Iron and ironing board
- Seam ripper (optional)
Sewing Machine Supplies
- Sewing machine
- Universal needle (size 80/12 recommended)
- Zipper Foot (reccomended)
Step-by-Step Instructions
Step 1: Prepare Fabric
- Cut all fabric and interfacing pieces to size.
- Fuse interfacing to the wrong side of the exterior fabric following the manufacturer’s instructions.
- Press all pieces flat.
Step 2: Attach the Zipper (First Side)
- Place one exterior piece right side up.
- Lay the zipper right side down along the top edge, aligning raw edges.
- Place one lining piece right side down on top, creating a fabric–zipper–fabric sandwich.
- Pin or clip in place.
- Using a zipper foot, sew along the edge with a ¼ in seam allowance.
Step 3: Attach the Zipper (Second Side)
- Flip both fabric pieces away from the zipper and press.
- Place the second exterior piece right side up.
- Lay the free side of the zipper right side down along the top edge.
- Place the second lining piece right side down on top.
- Pin or clip and sew with a ¼ in seam allowance.
- Press both sides away from the zipper.
Step 4: Topstitch Along the Zipper
- Topstitch ⅛–¼ in from the zipper on both sides.
- This keeps fabric from catching in the zipper and adds a polished look.
Step 5: Open the Zipper
- Important: Open the zipper at least halfway before sewing the pouch together.
Step 6: Sew the Pouch Body
- Match exterior pieces right sides together.
- Match lining pieces right sides together.
- Push the zipper toward the lining side.
- Pin around all edges.
- Sew around the pouch using a ½ in seam allowance.
- Leave a 3–4 in opening in the bottom of the lining for turning.
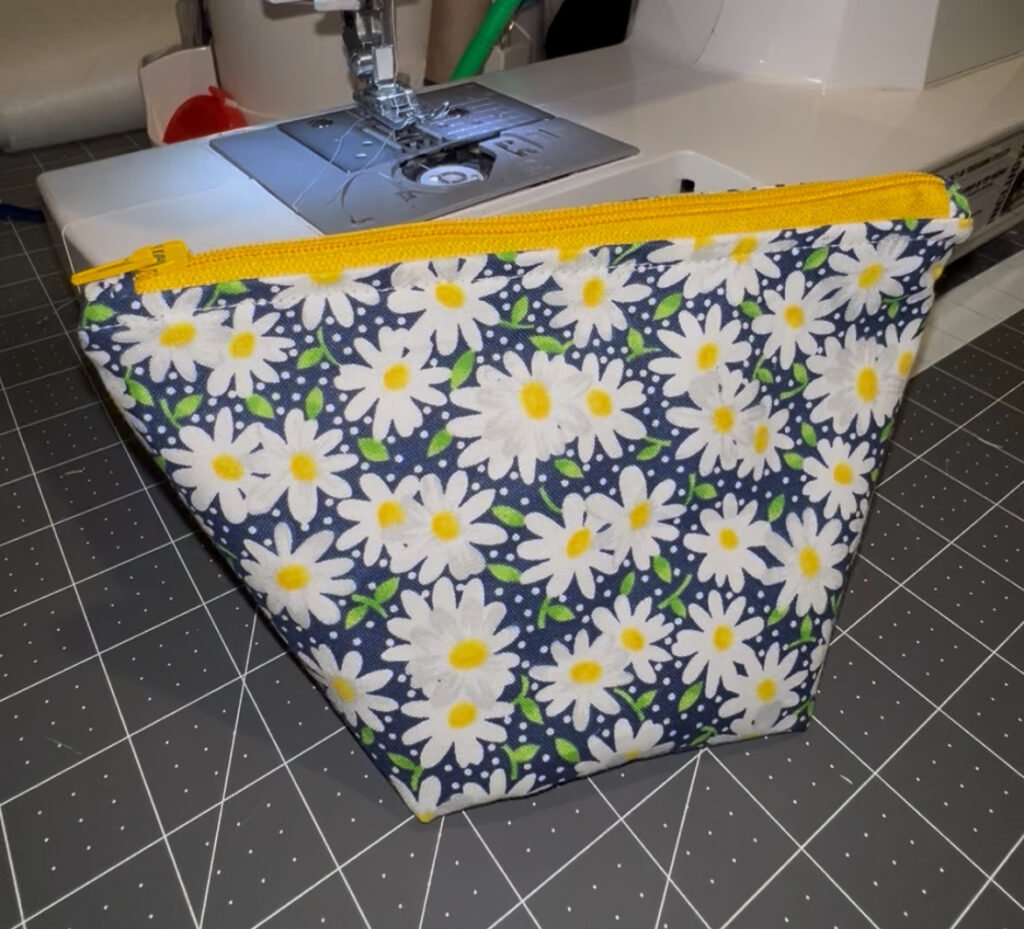
Step 7: Box the Corners (Optional)
- To create depth, pinch each corner so seams align.
- Measure 1 in from the point and sew straight across.
- Trim excess fabric.
- Repeat for all four corners.
Step 8: Turn & Close
- Turn the pouch right side out through the lining opening.
- Stitch the lining opening closed.
- Push the lining inside the pouch and shape corners neatly.
Step 9: Final Press
- Press the pouch flat, keeping the iron away from zipper teeth.
- Zip closed—your pouch is finished!
Optional Customizations
- Add a wrist strap
- Use contrast zipper tape
- Add labels, embroidery, or quilting
- Adjust size for cosmetic bags or pencil cases
Time & Skill Level
- Time: 30–45 minutes
- Skill level: Beginner
Like & Follow!
@bstitched Sew a flower zipper bag with me! #sewing #fyp #sewingideas #sew #sew ♬ At Last – Etta James